Home & Garden

Floating Plants 1024x576
Home & Garden, Latest Now

DIY- Creating your own floating planter

Floating a planter on your pool lends an unusual touch to finishing. The little, natively constructed island is easy to assemble and permits you to utilize ordinary plants or plants that improve in water as opposed to ashore. An enormous planter that is secured set up makes an untamed life well-disposed island. Adding candles to a drifting pool planter for a gathering or other exceptional evening brings wizardry in any case made exclusively by hostage fireflies. •             Block all seepage openings in the inside lower part of one plastic window box with a circle of inflexible froth sheeting that is 1 to 1/2 inches thick. The window box should have a 1/2 inch or more external lip. A choice is to utilize a can or dishpan with a 1/2 inch or more external lip; if the can or dishpan doesn’t have waste openings, it doesn’t require inflexible froth sheeting on its inside base. •             Line the vase or other compartment with Spanish greenery or coir tangling. Fill the compartment with gardening soil to inside 2 creeps of the holder’s top. •             Cut a length of froth, swimming noodle or protecting line cover tubing adequately long to surround the compartment’s edge. If you utilize a froth noodle, cut a cut in it, power the noodle over the holder’s lip and join the noodle’s closures immovably with conduit tape or heavyweight clear, plastic tape. On the off chance that you use pipe-cover tubing, slide its preformed cut over the compartment’s lip, and anchor the tubing along the holder’s upper edge with channel tape or heavyweight clear, plastic tape if important to hold the tubing solidly on the holder. The noodle or tubing makes a light collar for the holder. •             Cut a circle of unbending froth sheeting the breadth of the vase or the elements of the other sort of holder. Draw where openings ought to be on the froth sheeting to oblige plants. Cut the openings with a utility blade. Press the inflexible froth piece into the pot’s or other holder’s gardening soil. •             Wrap the pot or other holder with plastic deer or bird netting if your Planter might be upset by movement in the pool. The netting will assist with holding soil and plants set up until the plants are grounded. Secure the netting with tape. Punch holes in the netting with the utility blade so you can embed plants into the openings in the froth.

Herb Gardening
Home & Garden, Latest Now

Herb Gardening

Herb Gardening Herb gardening is becoming more and more popular every day, and for a good reason. Herbs have practical value, serve a purpose, and with herb gardening, you’ll actually use your plants. When most people consider herb gardening they automatically consider cooking, but herbs also are grown for his or her pleasant aroma and their beauty. One important part of herb gardening is drying the herbs to be used during the winter months, especially if you propose cooking with them. First, the tops of leafy herbs need to be cut, washed, and hung up for the water to evaporate. Then, tie stems together and hang them up during a sack to dry. After two to 3 weeks they need to be removed; crumble the leaves, dry them call at the oven, and store during a glass jar. One of the foremost common herbs gown in herb gardening is basil. dark Opal and regular green basil are beautiful additions to any garden and sometimes used as decoration. Dark Opal has light pink flowers and red leaves. Basil isn’t just used for its looks; it’s used for extra flavor in tomato juices and pastes. Chives are very petite looking and look like a blade of grass. they’re much stronger than they appear, however, and can grow well through a drought and a drought. Their toughness and sturdiness make Chives an ideal plant for herb gardening, especially if the gardener doesnít want plants that need tons of hassle. Chives are well utilized in salads, egg dishes, and lots of different sauces. Mint is additionally very simple to grow and is sweet to use in mint jelly, mint juleps, lemonade, and the other quite fruity drink. Mint is additionally good in herb gardening for its unique minty smell. Two herbs that appear in nearly everyone is garden are thyme and sage. Both of those herb gardening favorites are used for flavouring soups, chicken, turkey, pork, and other sausages. Sage is additionally grown sometimes for its beautiful blue spiked flowers. Lavender is perhaps the simplest smelling herb altogether of herb gardening and is usually utilized in candles, as a perfume scent, and to enhance the smell in linen chests. the sunshine purple flowers smell absolutely lovely. Other sorts of herbs often grown in herb gardening include borage (used in salads), chervil (used in egg dishes), sweet marjoram (flavors lamb, fish, salad, and soup), sesame (flavors crackers, cookies, and bread), and dill (flavors meats and utilized in pickles). Herb gardening allows gardeners to use herbs from their own garden for cooking, looks, and smell. Herb gardening will produce much fresher herbs with more flavor than store-bought herbs and are tons cheaper.

pexels nita 54300 scaled
Home & Garden, Latest Now

Dandelion Control – How To Get Rid Of Dandelions

Dandelion One of the hardest and toughest weeds to get rid of is the dandelion, especially if you are planning to use an organic dandelion killer for lawn care. So now you are at a crossroad; you do not want to use any lawn chemicals because you are aware of all the possible dangers which can occur with the use of chemically-based dandelion killers. However, you, like so many do not like to see dandelions in your lawn and want your landscape to be well kept. The truth of the matter is getting rid of dandelions in your garden using chemicals is much easier; but although choosing to use a chemically based dandelion control method could provide you with an easier route, it is generally not good for the soil or the inhabitants. First Look at the Dandelion  Dandelions are known as perennial broad-leaved weeds and will generally come back each year, often appearing during the early spring months and lasting until the arrival of the first cold weather in fall. Dandelions reproduce from seed and also their long deeply buried fleshy taproot which can go as much as up to 25 cm below the surface of the soil which accounts for their difficulty in getting rid of them. Because this taproot is so brittle, it is easily broken whenever you are trying to pull out the dandelion, allowing the weed to grow right back. How to Kill Dandelion Weeds using Organic Dandelion Killers for Lawns  The main problem when using most organic dandelion killers is that they rarely finish the job of completely getting rid of your dandelion weeds. Nonetheless, controlling dandelions using an organic dandelion killer for your lawn can be done, but requires a lot more attention than merely dumping some broadleaf herbicide on it or using a dandelion spray killer.  Most of the organic dandelion control methods used to kill dandelions kill only what they come into contact with. This generally makes the process more difficult as the organic dandelion killer does not move systematically through the tissues of the weed and down to the roots to kill them as seen with chemically based dandelion control methods. Instead, many of the organic dandelion killers are known to just burn off the top foliage of the dandelion, leaving the taproot intact, allowing the weed to grow back. So basically, what you often end up having to do is to continually kill the top growth of the dandelion until the weed has exhausted the energy within the taproot, resulting in the complete breakdown of the dandelion.  Dandelion Control Using Chemicals  On the other hand, most chemical herbicides such as dandelion spray killers used today in the control of weeds are specifically engineered for broad-leaved weeds such as the dandelion and when sprayed on the surface of the weed leaf will eventually transfer from the leaves down to the taproot, killing the dandelion entirely.  Having said this, although it is easy, you should also bear in mind the long term repercussions that most of these known dandelion spray killers will eventually have on your landscape soil and soil inhabitants. So, my advice – resist the temptation of ease as I am about to share the perfect organic dandelion killer recipe just for you.  The Organic Dandelion Killer Recipe  Step .1 Make the Decision  – The first major decision you will need to make is to decide just how many dandelions you are willing to tolerate in your lovely garden space. Try to pick a realistic number. Remember even if you are successfully able to kill all the dandelions in your garden, chances are the wind will inevitably blow more seeds in.  – Dandelions are known to reseed themselves quite easily, however, the good news is, new dandelions which may have found themselves in your garden would not be able to take a foot-hold provided you have a pre-emergent dandelion control method. If you have not got a pre-emergent dandelion control method in place do not worry, just pull them out while they are young, at about two weeks or younger. This way the taproots would not have been able to bury itself deep into the soil yet.  Step .2 Get Yourself into a Dandelion “Maintenance” Mode Timing is Key  – Choosing the right time for dandelion control can be really helpful. Notably, the best time to kill dandelions is during the early fall. Although the leaves of the dandelion will die during the winter months, the plant will transfer the necessary nutrients from the soil to their roots to ensure their survival during the winter. It is on this basis you are presented with the ideal chance of killing your dandelions when they are at their weakest before they are able to get the much-needed nutrients.  Step .3 Throw out The Old Dandelion Killing Ideas That Would Not Work  – Keeping a Healthy Lawn – Contrary to most beliefs, maintaining a healthy lawn does not smother out dandelions. In fact, I have often witnessed in a healthy and lush lawn, the dandelions just getting healthier and bigger, creating an even bigger problem.  – Mulching – Although mulching works perfectly with annual weeds, to smother perennial weeds such as the dandelion it is rarely effective due to the tendency of the weed to grow from seeds or roots left in the soil.  – Dandelion Spray or Flame Killers – Most of the dandelion organic spray and flame killers known for killing weeds using heat will only succeed in killing the top growth and not the taproot and as such, are hardly an effective dandelion control method.  – Notably, most contact weed killers will require the dandelion to be sprayed 2-3 times before you are able to notice any difference. Not to mention that many of these dandelion spray killers are non-selective and can be fatal to the growth of your grass, and flowers in your garden.  So Where Does It Leave You, You Ask? Well, the answer is quite a simple one.

poodle lying on comfortable bed 3554424 scaled
Home & Garden

Best Interior Decorating Secrets – Decorating Tips and Tricks

Best Interior Decorating Secrets – Decorating Tips and Tricks Best Interior Decorating Secrets Home interior designing can be challenging and intimidating for most homeowners. It’s often a costly investment that you’ll be using for a number of years or even decades. However, we’ve compiled a few tips from the best home interior designers in the world that can help you on this adventure: Hang your Artwork Properly Ensure your paintings are hung at eye-level. Experts recommend placing it at a height of 57 inches, which is a rule followed by most art galleries around the world. Use Your Furnishings to Determine the Color Scheme Take a look at your favorite rugs, curtains, or furniture pieces. Choose the paint of your walls accordingly. For instance, if your rugs have hints of blue on them, play that color up, either on your accent walls or your regular walls. In case your couch is colored turquoise, you could try contrasting colors like yellow or orange. You could also try out wall stencils, which are an inexpensive and great way to generate interest in your room’s design. Do Not Go Overboard When It Comes To Themes If you’re looking to design specific themed spaces, ensure you don’t overdo it. Many people make this mistake and the end result often winds up looking amateurish. You should stick to themes that have paint colors. Add minimal collectibles and artwork for completing this look. Go for Layer Lighting Overhead lights may not always be sufficient enough for your needs. Therefore, try using a single central lighting fixture to light up the room. This should be supplemented with wall sconces and lamps to amplify the effect. Layer lighting will ensure that the spotlight isn’t restricted to a single area and spread the attention throughout your entire room. Hang Up Mirrors Apart from increasing the interest in your room, mirrors are also useful for making your space look brighter and bigger. If you hang them on walls, which are directly opposite to the windows in your room, the light entering the room will bounce further into the room. Area Rugs Are Important Ensure that your chairs and sofa fit perfectly well on the area rug. You can also try placing your furniture partly on your rug and partly outside it to enhance the look of your room. Don’t use small rugs though – they may make your room’s scale seem disproportionate. Remove All the Clutter All home designs are dead-set against clutter. Therefore, it is essential to use a home interior design that eliminates clutter completely. You could try organizing your books in horizontal stacks on vertical rows. You could also try using decorative baskets and bins for storing your magazines, pens, keys, and mail. Increase the Greenery Almost every home design makes it a point to include a flower vase or houseplant to enhance the look of your house. Flowers and plants are actually a great way to increase the color in your room. Add More Pillows Pillows happen to be a great, inexpensive, and quick interior design item that can improve the look of your old furniture pieces. You could include them in your room in contrasting textures and colors. Add at least 4 pillows since anything less than that could wind up looking too skimpy.

raised garden bed scaled
Home & Garden

Best DIY Raised Bed Garden Ideas & Designs

    Top 5 Raised Garden Bed Ideas Choosing to grow your own food does not necessarily mean that you will be saving a lot of money. Isn’t what you wanted to hear? Let’s continue. Growing your own food without the proper knowledge can easily run you into hundreds of dollars when trying to create a suitable landscape garden. If you are looking to save yourself some money and are considering how best you can keep your gardening costs down to a minimum, you are in luck. In this article, I will be showing you just how you can grow your vegetable garden by using a few of my very own raised bed gardening tips. Building a raised garden bed is one of the more popular ways of growing your vegetables and herbs. And depending on the types of materials you use, your raised garden bed project can turn into a costly one. Nonetheless, consider yourself in good hands as there are ways you can build your raised garden bed without breaking the bank. First, let us answer the basic question to get a look at the facts. Why do we need a raised vegetable garden design?   Using a raised garden bed design allows you to have better control of the soil used for your vegetable garden. You can first begin with fresh soil or a soil mixture of your choosing. Building a raised garden bed guarantees that you will be able to keep the soil from being accidentally trampled on and compacted. Raised garden beds are also known for improving heat transfer through the soil in addition to the rate of germination. If you hate bending as I do, you will find that the idea of a raised vegetable garden offers you the comfort of easily tending to your green without having to bend all the way over to harvest your vegetables. I have even seen pictures of raised garden beds where the garden bed was raised high enough to facilitate persons with physical disabilities who have to use wheelchairs to do their gardening. Let us look at five of the best-raised garden bed ideas below; you can definitely find something that you can easily start off with. Build it Yourself Using a Brick Lined Frame If you are thinking about building your raised garden bed yourself and consider yourself to be a bit of a do-it-yourself person, consider using a raised garden bed design with concrete or brick-lined frame. Using a concrete frame although it offers a more durable option is a permanent one and cannot be redesigned after it has been completed.     One alternative to using a concrete or brick raised garden bed is by using a galvanized steel wire mesh with a geotextile fabric lining on the inside. You can use some cable ties to secure the geotextile in place. I have found that you can vary the thickness of the wire used for the mesh to determine the desired shape of the raised garden bed for a more creative effect.   Use Some Grow Bags Using some grow bags for your raised garden bed provides you with a variety of options. You can easily pick up one of the highly-rated no assembly Big Bag Bed at your local gardening depot or on Amazon.com for anywhere between $20-30 depending on the size. The advantage of using this raised garden bed design is the affordability of not having to use any setup tools or additional material. Just purchase, layout and fill with your soil or soil mixture and greens and let them grow. Nonetheless, if you are looking for an even less expensive design, use some burlap sacks to create your raised vegetable garden bed. You can get a burlap sack for just around $1 at your local hardware store. Not only are they great for designing your raised garden bed, but they are also eco-friendly and unique.   Purchase a Raised Garden Bed Kit Lately, there have been some good reviews about some of the available raised bed kits, most of which have been designed to be used without the need for any tools. One of the more popular kits is Home Depot’s Greenland Gardner Kit which can be purchased for about $29 and is easily assembled – no tools necessary. In fact, you can even expand this kit with a few extra add-ons to create a much larger and deeper space for your raised garden bed. Log It You can build your raised vegetable garden bed using a few straight logs about one foot in diameter to create the edges of your raised garden bed. You can also use some logs of a smaller diameter to stack the ends of your raised garden bed. You will want to avoid using very large logs by lining up shorter sections with fire-wood length logs. Greenfingers Metal Galvanised Raised Garden Bed, 210 x 90 x 30cm, Set of 2   Cedar Planks and Rebar Undoubtedly, one of the best designs for your raised vegetable garden bed is the cedar plank and rebar. This bed can be easily build using some cedar wood or even leftover lumber of almost any size just as long as the wood has not been pretreated with any chemicals. Hold the blanks securely in place on edge using short length rebars driven into the ground, and spaced at about 2 to 3 feet apart and fill with your soil mixture. Building a raised garden bed can be an enjoyable experience for the novice gardener who is not sure they are ready to turn their back yard into a full-blown vegetable farm. You will easily be able to create a simple design for a raised vegetable garden idea elevated towards the back adjoining your fence or even on your terrace or other paved areas. I always recommend starting off with one or two raised garden beds and build some later. Your raised garden bed may even include using the raised vegetable garden

pexels photo 3604314 scaled
Home & Garden

Creeping Thyme Plant Care – How To Plant Creeping Thyme

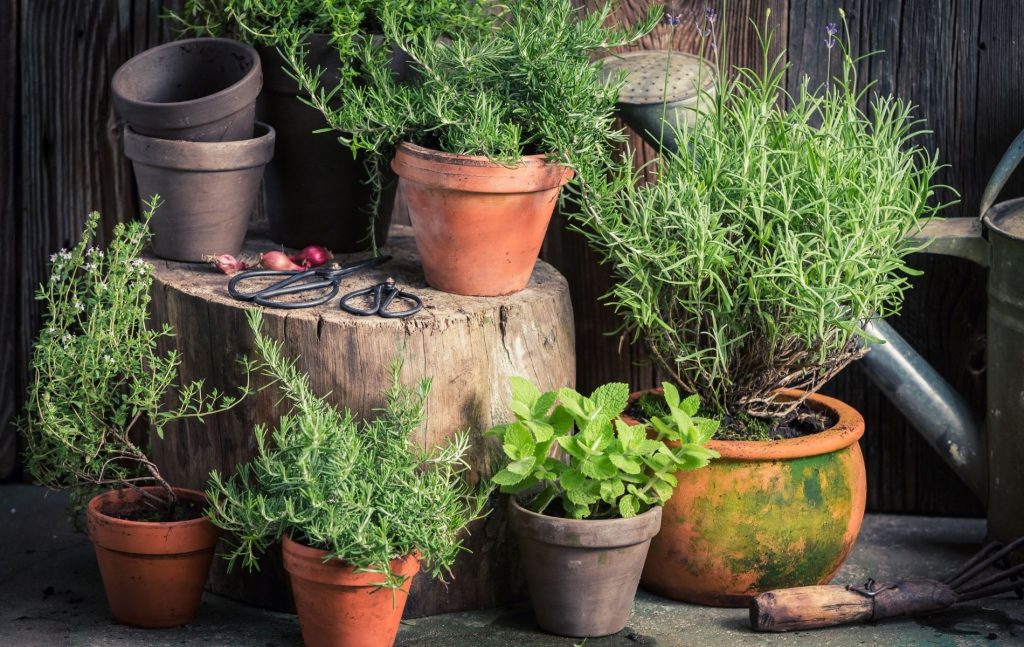
Creeping Thyme Plant Care- Seeds in 5 Easy Steps The thyme, also referred to as the “Mother of Thyme”, is usually considered one of the simplest low ground garden covers or lawn substitutes. a flexible plant, the wild thyme are often planted during a number of the way included but not limited to, providing color to your garden or reducing the value of lawn maintenance. The wild thyme is just one among those plants which are easy to grow and is understood to survive quite well with little or no care. Most persons have often used the creeping thyme as a suitable lawn replacement in the parking strip in front of their homes. Undoubtedly, the creeping thyme magic carpet or Thymus Serpillum is a great substitute, as it does not require mowing or any significant amount of watering, yet at the same time, it offers a pleasing appearance and can even withstand being trampled on. Having said that, there are very few ground covers that can be walked on, and the creeping thyme is one of them. This makes the creeping thyme an ideal ground cover plant to be used in-between stepping stones, at the base of a heaped arrangement of rocky stones in the garden, or close to the adjoining walkway of the patio. The creeping thyme, due to its tendency for maintaining a low growth, is often used effectively in the foreground of just about any type of planting of the landscape. It is especially used in garden areas which are designed with plants cascading over a rockery area as well used as a type of garden fill in-between evergreen plants.    The creeping thyme grows to a height of between two to four inches high and is known to spread for as much as up to two or more feet in width. The leaves of the creeping thyme, although quite small, are very dense, and will adequately cover any low growing plants. Foliage color varies in different shades of light and can be seen occasionally appearing from dark green to an appealing grayish color as in the woolly thyme. The foliage color of other types of the creeping thyme often varies with the plant’s flower color, with lighter flowering strains having lighter foliage. Flower colors will also vary sometimes appearing in shades of white, red, lavender or rose and will generally bloom during the late spring and early summer. The creeping thyme flowers so abundantly that you can hardly see the evergreen leaves below and given its ease of maintenance does not tend to take-over the lawn space due to its tendency to naturally confine its growth to a specific area.  The creeping thyme will grow whether it is placed in bright sunlight or in the full shade. However, it should be noted that they usually do not flower as abundantly when kept in the full shade, and sometimes tend to grow thinly and dispersed. Most strains can be easily found at several nurseries and garden outlets where they are frequently sold in trays, flower pots or as bulk creeping garden seeds. Let us now look at 5 easy steps to plant and harvest these creeping thyme seeds.    Sowing Creeping Thyme Seeds Creeping thyme seeds are best sown indoors during the spring or autumn months at around 13°C or can be sown directly into your garden between the months of May through to August.  Sowing Your Creeping Thyme Seeds Indoors You can sow your wild thyme seeds on the surface of a lightly firmed and moist seed compost in either pots or trays. However, don’t cover them as so as to germinate they’re going to need some amount of sunlight. Cover the container with a piece of glass or clear plastic and allow the plant to be exposed to some diffused light. As soon as the plants become large enough for you to hold, transplant the seedlings into some 3-inch pots and allow them to grow. For the next 10 to 15 days before planting in the outside garden, steadily acclimatize to outdoor conditions to reduce the risk of frost. 
And do note, when transplanting, it is often recommended that you pinch out the tip of each stem to allow the plant to grow in an outward manner and always plant between 8 to 12 inches apart. Sowing Your Creeping Thyme Directly Into Your Garden Prepare your creeping garden ground cover by lavishly mixing an outsized amount of organic humus into the soil. Processed manure, compost also as peat and moss are generally considered as perfect additives for the soil and will be mixed with about half your current soil mixture. you’ll only get to prepare the soil to about 6 to 10 inch deep. Remove any existing stones and weeds and level out until you’ve got a fine tilth.   Distributing Your Creepy Thyme Seeds across the Soil.  To allow for a more evenly distribution magic carpet, you ought to mix your wild thyme seeds with some sand. Lightly apply some pressure on the seeds into the soil, but try not to cover the seeds. Apply an adequate amount of water, continuously watering it, especially when the climate is hot. Once seedlings have matured outwards to about 12 inches apart, replant the thinning areas.  Fertilizing Your Creeping Thyme  Just about any type of liquid plant food including fish fertilizer can be used to fertilize your creeping thyme. During the months of late spring and early summer is recognized as the best time to fertilize your creeping thyme. Propagation  Regardless of the fact that dividing the plant is often regarded as the best form of propagation, new creeping thyme plants can also be grown from seeds. However, to date, there are not a lot of garden stores known for carrying creeping garden seeds. Nonetheless, creeping thyme seeds can be purchased from a number of Canadian garden stores such as Veseys and McKenzie Seeds if needed.    Notably, there are several species of creeping thyme. The most common type of creeping thyme is the popularly known thymus Vulgaris, which is often used as a creeping thyme ground cover. However, since this species is known to grow somewhat taller than the other varieties, it is not suitable to be sown as

wild bee motel   crown bees full width
Home & Garden

Bee Lodges-A Beginner’s Guide to Beekeeping

Honey Bees for Sale – Best 5 Bee Lodges You Can Get for Beekeeping   Bee lovers, here are some Mason and honey bees for sale! Yes, you can definitely buy these bees online and offline, but nothing beats keeping your own for pollinating your flowers or trees, especially Mason bees, as they are gentle, non-stinging and remarkable pollinators. Here are the top 5 bee lodges or houses that you can consider purchasing if you want to start attracting these cute pollinators to your garden now. Or they can act as an educational tool for your kids too. Have fun! Schrodt Designs Model MB-L Mason Bee Lodge One amazing bee lodge is this Schrodt Bee Lodge, as this is one of the better-looking bee houses around. It is heavy, stable and the roof extends over the holes to keep the interior dry and comfortable for the bees. Installation was easy too, and feedback I have got said that within a month or two, nearly 90 percent of the holes were pollinated. Also, easily clean it out by removing the back part, and you are ready to start another batch instantly. The brochure attached will make everything clearer to you if you have no prior experience with bees or mason bees. Click here for more information.  Coveside Solitary Bee House The Coveside Solitary Bee House is easy to upkeep because it requires no maintenance but this type of house is more suitable for native or mason bees which are solitary pollinators. Handcrafted with Eastern white pine wood in the United States, just hang this near your garden, and you are basically done! Purchase it here. Mason Bee House Made from long-lasting bamboo, this Mason Bee House is specially designed to attract Mason bees and boost your garden’s productivity by providing a happy home for this peaceful breed of bees, which are great pollinators, visiting as many as 1,000 blooms a day – that is 20 times as many as a honey bee. This house is perfect for hanging against a tree or wall with the morning sun, and these bees will come. Check out more information here. Cedar Wood-Mason Bee House     Handmade from Western Cedarwood, this Mason Bee House comes in an attractive diamond shape of 11-inch tall, 4-inch deep and 5-inch wide, and holes that are 5/16 inches replicate the natural cavities that Mason bees are attracted to, making this a great receptacle for attracting these pollinators. The attractive design also makes sure that it is a conversation piece for anyone who steps into your garden. Click here to find out more.  BeeAdventure Mason Bee House This is your perfect starter kit to keep Mason bees because it assembles easily without the need for any tools. The kit includes 25 easy tear straws or nesting tubes, which allow you to check the health of your bees in the harvest and also, the long overhanging and slight angle keeps the straws drier to provide more comfort to the bees. Click here for more information. Metal Roof Mason Bee House With a pitched metal roof and many hollow bamboo tubes that measure 1/8-inch to 3/8-inch, this adorable metal roof Mason Bee House is the perfect addition to any yard where trees, fruits, flowers, and herbs need to be pollinated. Its attractive design, construction, and finish will provide a wonderful home to attract the docile Mason bees. Click here for more information. Tierra Garden 37-565 A-Frame Mason Bee House Made of fir and durable bamboo, the Tierra Garden Mason Bee House will provide a welcome environment for any Mason bee. You can hang it near your garden, raised beds, flowers or fruit trees, and the Mason bees will come. Click here to find out more. We hope you have got enough details to make an informed choice – do consider one of the above setups for pollinating your garden. We are quite sure you will love it.    

potted green indoor plants 3076899 scaled
Home & Garden

Best Indoor Plants – Good Inside Plants for Small Space

  Top 10 best indoor Plants That Need Little Light   It is quite understandable that there are some people whose daily work schedule offers little or no time whatsoever to give their plants the care and attention often required, especially if the living conditions within the home does not provide the necessary sunlight needed for a suitable living environment for the plant to thrive or even survive.  One of the main concerns expressed by most people with a busy schedule and who are considering getting a houseplant is the plant’s ability to survive in a low-light setting. For a plant to survive, you need to create the right setting which duplicates the plant’s natural habitat. And although you may be able to recreate the favorable conditions suited to the plant’s needs, the key ingredient to determining the survival of your plant is choosing the correct house plant for your home or office shade.  Choosing a house plant for a location within the home or garden that offers a low light setting can easily become a challenging and often frustrating task. Any location within the home at a distance of eight feet or more from a large enough window is considered as subject to a low light level. Such areas may include, hallways, a room with small or heavy drapes, basements or office spaces.  If you are looking for some large house plants for a selection of low light spaces within your home, walk with me as we take a look at the top ten large house plants that are best known to thrive in a low-light environment.    The Snake Plant    Undoubtedly one of the easiest plants to grow, the architecturally shaped snake plant does quite well when neglected. The snake plant with its versatility is generally seen in both short and tall variations often between 4 to 6ft tall, making it the perfect houseplant addition to your home. Best known to withstand low-light settings, the snake plant is also known to thrive when placed in a brighter location. However, in spite of its adaptiveness, the snake plant is known to develop a condition known as root rot if exposed to too much water.   The Arrowhead Vine    If you have ever heard of the arrowhead vine, you may already know that this large house plant featuring its distinctly arrow-shaped leaves is one of the most common and best-recommended house plants that need a low amount of light. Even within a low light setting, these colorful leaves of the arrowhead vine are known to keep their variegation. Unlike many plants, there are several variations of the arrowhead vine to choose from. Depending on the type of arrowhead vine, this house plant will generally contain variegated foliage on its arrow-shaped leaves and will have either a number of white or bronze markings with small sketches of pink. Smaller species of the arrowhead vine are known to form a mound that can grow to as much as a foot in height and will vine its stems as the plant continues to grow. The arrowhead vine can be grown upright in a flower pot or trailing in a hanging basket.    The Pothos    The Pothos, with its heart-shaped leaves, is frequently confused with the heartleaf philodendron. This low-maintenance household vine can be grown as a potted tabletop plant, trained in an upright position with support or in a hanging basket. Although the Pothos is recognized as a houseplant requiring a small amount of light, when placed in adequate sunlight, its leaves are known to display increased variegation.    Cast-Iron Plant   True to its name, the cast-iron plant is one of the most resilient plants you could ever choose for your low light house plant. The cast-iron plant is known to thrive in low light, low humidity, varying ranges of temperature and mistreatment. The cast-iron plant is often seen as a slow grower. As such, you should choose a plant large enough to fill the space you are looking to highlight with your household plant. Several species of the cast-iron plant are known for having yellow or white variegations on their leaves.  The Dieffenbachia Many closely related species of this low light level household plant share its common name. Best known for its large green and white leaves, the Dieffenbachia will create a tropical look and feel for just about any room within your home or office. All known species of the Dieffenbachia produce cane-like stems, with lush foliage, variegated in white and green and seen in many large household plant pictures. The Dieffenbachia can be grown as a single large house plant like a tree which requires low light. The plant can also be grown by grouping several Dieffenbachia together in a single flower pot to create a shrub-like appearance.  The Philodendron    A strong, easy growing foliage plant, the heart-leaf philodendron is generally seen as a large low light house plant used within the home. Best known to thrive in low light locations, the philodendron, with its attractive heart-shaped leaves, can frequently be seen trailing over the edge of a bookcase or suspended in a hanging pot.  The Zeezee Plant    Another easily grown houseplant that grows well in a low light setting and thrives on neglect is the succulent Zeezee plant. One of the preferred household plants by most persons, the Zeezee plant is better-known for its thick, durable, fleshy and shiny leaf stalks. However, this plant is noticeably a slow grower so when purchasing, try to ensure that you select a large house plant if you are looking for a sizable specimen.  The Chinese Evergreen  Considerably the Chinese Evergreen is awarded by many as one of the best choices of house plants to brighten low-light areas within the home. The Chinese Evergreen, with its great foliage and varying shades of green, silver and gray is widely used within several shopping malls. They can often be seen placed around the base of taller tree-like house plants

brown and beige living room interior 1040893 scaled
Home & Garden

Creative Home and Gardening Ideas

Top Garden And Home Design Ideas To Take The World By Storm In 2020- Every year, trends come and go, and the hardcore interior and landscape designers follow these closely. They make sure to create more trends all year and even for the next. What was making heads turn last year is a passé. The year 2020 is packing in many vibrant colors and styles, and we are now listing the best ones for you to use. Creative Home and Gardening Ideas Navy Blue Interiors: The navy blue will dominate the scene, as many top designers had predicted it from the last year itself. Navy blue walls can accentuate the oomph of the walls while you can go lighter on the other walls.   DIY Planters all the Way: Indoor or outdoor plants, whatever is your choice, homeowners are trying to use their crafting skills to the best. From repurposing or upcycling the old bottles, boots, cartons, and jerry cans, DIY planters are quirky. Painting them in bright colors only makes them the eye-catchy garden or porch décor.   Floral Wallpapers Everywhere: Though the floral wallpapers have been around for generations, more orchids in bright colors are taking over. 2020 is surely nothing that we have seen so far. Though many might cringe at the thought of the flowery walls and feel it might be a tad too bright for their comfort, it is worth the try. These flowery wallpapers are great at boosting your creativity.   Vertical Gardens: With space concerns on the rise, the modern designers and homeowners with a green thumb are going out for the vertical garden. Using up the wall facing your home or window or the fence around the house, you can expand your love for the green.   Kitchens are Anything, not just White: Until now, there has been a love for white kitchens. 2020 is going to put that idea to rest, at least for now. This year, we will see more colors to enter and make a vivid splash of pop colored cabinets, backsplashes, and counters.   Vintage Highlights: Vintage ideas may not be prominent in the contemporary flats and studio apartment-style homes. However, they are still there in the furniture and shelves in the tiniest form of accents. These are simple styles that people are employing as a tribute to the era gone by! The year 2020 surely looks promising, and these are a few prominent ideas to make a big difference so far. As the year progresses, we are all set to welcome more novel ideas and trends to make your home and garden look exceptional. Creative Home and Gardening Ideas Find more magazineup.com

Scroll to Top